Advertisement

Assembly of a Stacked Cake
Appears in

By Bo Friberg
Published 2003
- Trim corrugated cardboard cake sheets to make circles or squares, each slightly smaller than the sponge layers. Use a sharp utility knife to cut precisely and evenly. It is essential that you use the thick grade of corrugated cardboard, not just to ensure proper support for the cake but to avoid having the cardboard warp. To make a disposable base, cut out 2 extra cardboards, one about 1 inch (2.5 cm) smaller and one 3 inches (7.5 cm) larger than the piece cut for the base tier of the stacked cake.
- Decorate the largest cardboard as appropriate — with a doily or by wrapping it in a smooth layer of decorative embossed foil. If you use doilies, do not attach them with staples. Staples can come loose easily and work their way into the cake. Glue the smaller extra cardboard in the center underneath the decorated cardboard to elevate it slightly. You can, of course, place the cake on top of one of the cake plates from a traditional cake stand, use a suitable platter, or use a cake pedestal, in which case you do not need to make this base.
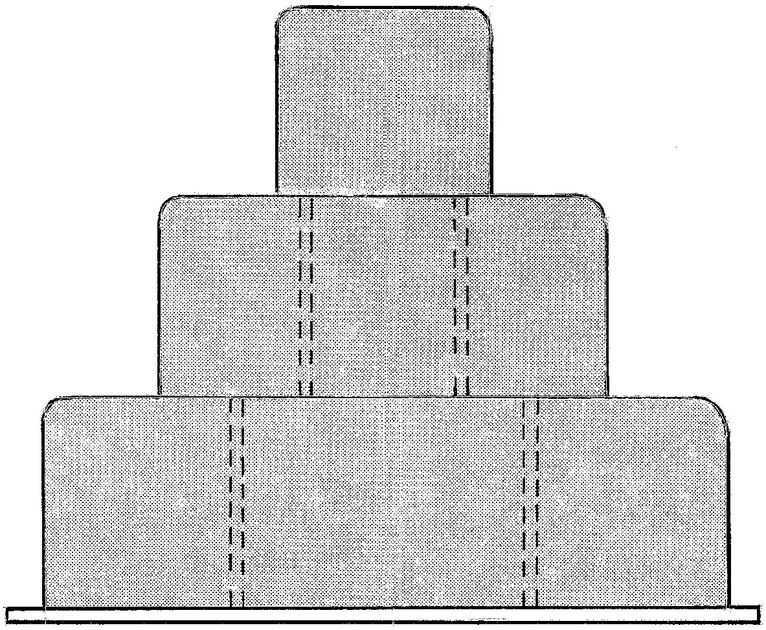
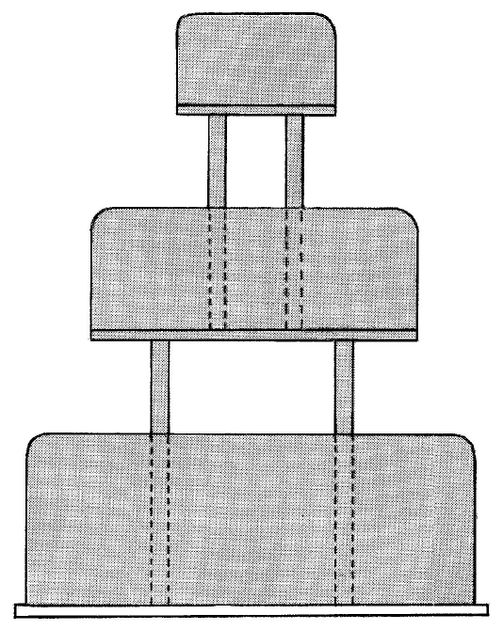
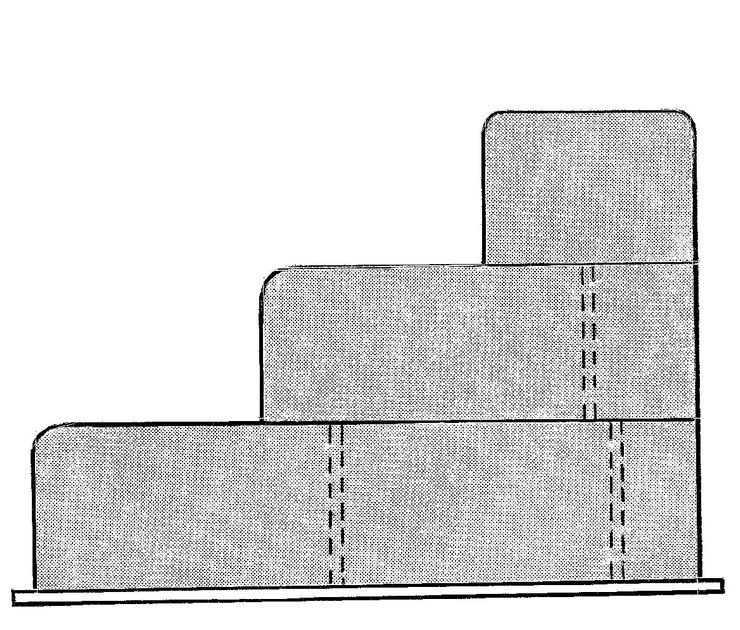
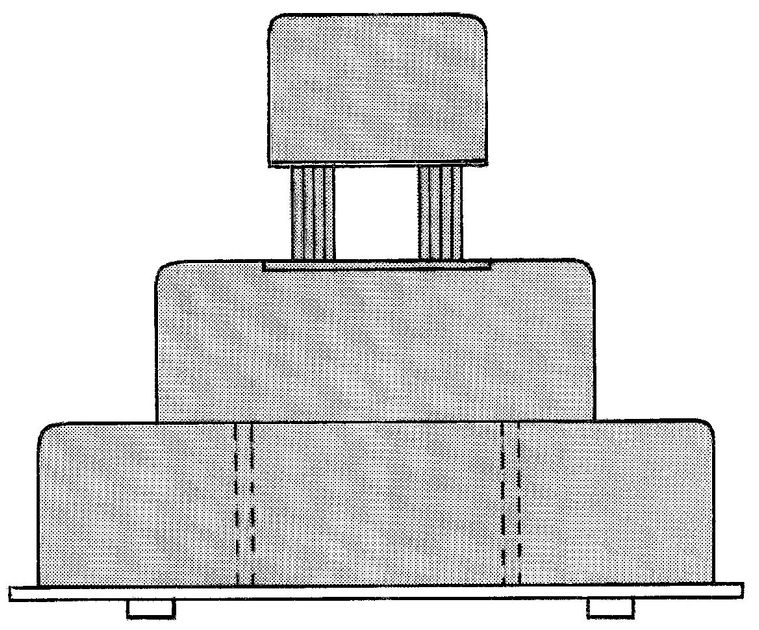
- Cut hollow pipes of clear plastic, ½ to ¾ inches (1.2 to 2 cm) in diameter, into lengths just slightly longer than the height of the cake layers. The pipes should not show in the finished cake (Figures 2-3 and 2-4). In general, you need 4 pipes to support each of the larger layers and 3 pipes to support each of the smaller sizes. Make certain that all of the supports used for each layer are exactly the same height, or the cake will lean. Alternatively, you can make the support pillars longer (Figure 2-5) or use a combination of pillars that are not visible and pillars that are (Figure 2-6).
Figure 2-3 A stacked wedding cake with the tiers centered; the dotted lines show the placement of the support pillars
Figure 2-4 A stacked wedding cake with the tiers justified to one side; the dotted lines show the placement of the support pillars
Figure 2-5 A tiered wedding cake with visible support columns
Figure 2-6 A combination stacked and tiered wedding cake
- Fill and layer the cakes and ice with the crumb layer, as described in the directions for assembly using a cake stand. When the crumb layer is chilled, place the layers, one at a time, on the turntable and ice the tops.
- A nice way to decorate the sides of a stacked cake is to pipe vertical lines of buttercream on the sides, using a No. 5 (10-mm) flat star tip. Pipe the strips next to one another, making sure you cover the cardboard at the bottom at the same time; pipe from the bottom to the top. Another option is to leave about ¼ inch (6 mm) between the strips, then fill in the space later with a series of small dots, made using a No. 3 (6-mm) plain tip. (Space the dots evenly from top to bottom, with the bottom dot covering the cardboard.)
- A third popular option is to decorate the cakes with a basketweave pattern; see “Making a Basketweave Pattern,” at right.
- Level any buttercream that sticks above the edge on the top. Holding the spatula at a 45-degree angle against the cardboard, do the same on the lower edge of the cake. Decorate the top of the layers with a pearl pattern piped with a No. 3 (6-mm) plain tip.
- When all of the layers are iced and decorated, place the bottom layer on the base made earlier, attaching it with loops of tape so it will not slide. Push the plastic pipes into the cake, spacing them evenly and placing them so that the next layer will fit securely on top. Stack the remaining layers with pipes in between in the same way. Finish decorating the cake as desired.
- Although you could stack enough cakes to serve a wedding party of 400 to 500 guests if the layers were supported properly, it would be a very expensive cake and not really practical, as it would take a long time to serve. A better option is to make a smaller cake for display and the cake-cutting ceremony and to make up the remainder of the servings from sheet cakes with the same flavors of sponge, filling, and buttercream. The sheet cakes can be cut and plated ahead of time and be ready to serve from the kitchen. This is also a good option to suggest to a customer who has a more typical guest count of 100 to 200 people as a way of reducing cost.